How to Install and Use Lighthouse to Optimize Your Website Performance

Introduction
Google Lighthouse is a powerful, open-source tool that audits your web pages and provides actionable insights to improve performance, accessibility, SEO, and best practices. In this guide, we'll cover everything from installing Node.js and Lighthouse to understanding the key metrics in Lighthouse and ways to optimize your server, including caching, Nginx compression, and image handling.
1. Installing Node.js on Windows, Linux, and macOS
Before you can run Lighthouse from the command line, you’ll need to install Node.js, which comes with npm (Node Package Manager).
Windows
node -v
npm -v
- You should see version numbers for both Node.js and npm.
Linux
On many Linux distributions, you can install Node.js via your package manager or use a Node Version Manager (nvm).
curl -o- https://raw.githubusercontent.com/nvm-sh/nvm/v0.39.1/install.sh | bash
nvm install --lts
Verify:
node -v
npm -v
Using Package Manager (Ubuntu Example):
sudo apt update
sudo apt install nodejs npm
node -v
npm -v
macOS
brew install node
Verify Installation:
Open Terminal and run:
node -v
npm -v
What Does the -g Flag Do?
When you install a package with npm using the -g flag (e.g., npm install -g lighthouse), it installs the package globally. This means you can run the command from any directory on your system rather than having to install it for each project. Global installations are perfect for command-line tools like Lighthouse.
2. Installing Lighthouse
With Node.js and npm installed, you can install Lighthouse globally by running:
npm install -g lighthouse
After installation, you can run Lighthouse by typing:
lighthouse https://yourwebsite.com --view
This command audits your website and opens a detailed HTML report in your default browser.
3. Understanding Lighthouse Metrics
Lighthouse evaluates your website across multiple categories. Here are some of the key metrics:
- First Contentful Paint (FCP):
The time until the first piece of content is rendered. Faster FCP means users see content quickly. - Largest Contentful Paint (LCP):
Measures when the largest element on the page is visible. A fast LCP is critical for user experience. - Speed Index:
Indicates how quickly the contents of a page are visually populated. - Total Blocking Time (TBT):
Time during which the page is blocked from responding to user input. Lower TBT improves interactivity. - Cumulative Layout Shift (CLS):
Measures visual stability; low CLS means fewer unexpected shifts during page load. - Time to Interactive (TTI):
The time it takes for the page to become fully interactive.
Lighthouse also audits diagnostic aspects like caching effectiveness, compression, render-blocking resources, and more.
4. Improving Website Performance
Based on Lighthouse’s findings, here are some actionable steps to improve your site's performance.
4.1. Nginx Caching
Caching reduces the workload on your server and speeds up page delivery.
sudo rm -rf /var/cache/nginx/*
sudo systemctl reload nginx
Tune Your Cache Settings:
In your Nginx config, set up caching as follows:
proxy_cache_path /var/cache/nginx levels=1:2 keys_zone=my_cache:10m max_size=1g inactive=60m use_temp_path=off;

server {
    location / {
        proxy_cache my_cache;
        proxy_pass http://backend;
        proxy_cache_valid 200 302 10m;
        proxy_cache_valid 404      1m;
    }
}
4.2. Nginx Compression
Enabling gzip compression reduces file sizes and speeds up resource delivery.
http {
    gzip on;
    gzip_vary on;
    gzip_proxied any;
    gzip_comp_level 6;
    gzip_types text/plain text/css application/json application/javascript text/xml application/xml application/xml+rss text/javascript;
}
4.3. Asset Optimization and Image Compression
Your site serves images in WebP format, which is already optimized for size and quality. Ghost generates multiple responsive sizes via the srcset attribute. This means additional image compression might not be necessary unless you want to further reduce file sizes.
smalley@workerakadataltd:~$ cwebp -q 70  original.png -o optimized.webp
Saving file 'optimized.webp'
File:      original.png
Dimension: 8160 x 4592
Output:    1234962 bytes Y-U-V-All-PSNR 41.54 45.64 45.48   42.51 dB
           (0.26 bpp)
block count:  intra4:      65692  (44.88%)
              intra16:     80678  (55.12%)
              skipped:     54927  (37.53%)
bytes used:  header:            375  (0.0%)
             mode-partition: 269458  (21.8%)
 Residuals bytes  |segment 1|segment 2|segment 3|segment 4|  total
    macroblocks:  |       1%|       7%|      16%|      76%|  146370
      quantizer:  |      39 |      39 |      33 |      26 |
   filter level:  |      11 |       8 |      42 |      34 |
smalley@workerakadataltd:~$ ls -lah original.png optimized.webp
-rw-rw-r-- 1 smalley smalley 1.2M Feb 24 09:51 optimized.webp
-rw-rw-r-- 1 smalley smalley 170M Feb 24 09:48 original.png
smalley@workerakadataltd:~$
smalley@workerakadataltd:~$ cwebp -q 100 original.png -o optimized.webp
Saving file 'optimized.webp'
File:      original.png
Dimension: 8160 x 4592
Output:    8560476 bytes Y-U-V-All-PSNR 52.51 53.92 54.84   53.05 dB
           (1.83 bpp)
block count:  intra4:      92013  (62.86%)
              intra16:     54357  (37.14%)
              skipped:      3477  (2.38%)
bytes used:  header:           1141  (0.0%)
             mode-partition: 457760  (5.3%)
 Residuals bytes  |segment 1|segment 2|segment 3|segment 4|  total
    macroblocks:  |     100%|       0%|       0%|       0%|  146370
      quantizer:  |       0 |       0 |       0 |       0 |
   filter level:  |       0 |       0 |       0 |       0 |
smalley@workerakadataltd:~$ ls -lah original.png optimized.webp
-rw-rw-r-- 1 smalley smalley 8.2M Feb 24 09:52 optimized.webp
-rw-rw-r-- 1 smalley smalley 170M Feb 24 09:48 original.png
It is however interesting what webp does to the image, below bottom right 1/2 of the image is the webp conversion. The top left 1/2 is the png, down-scaled.
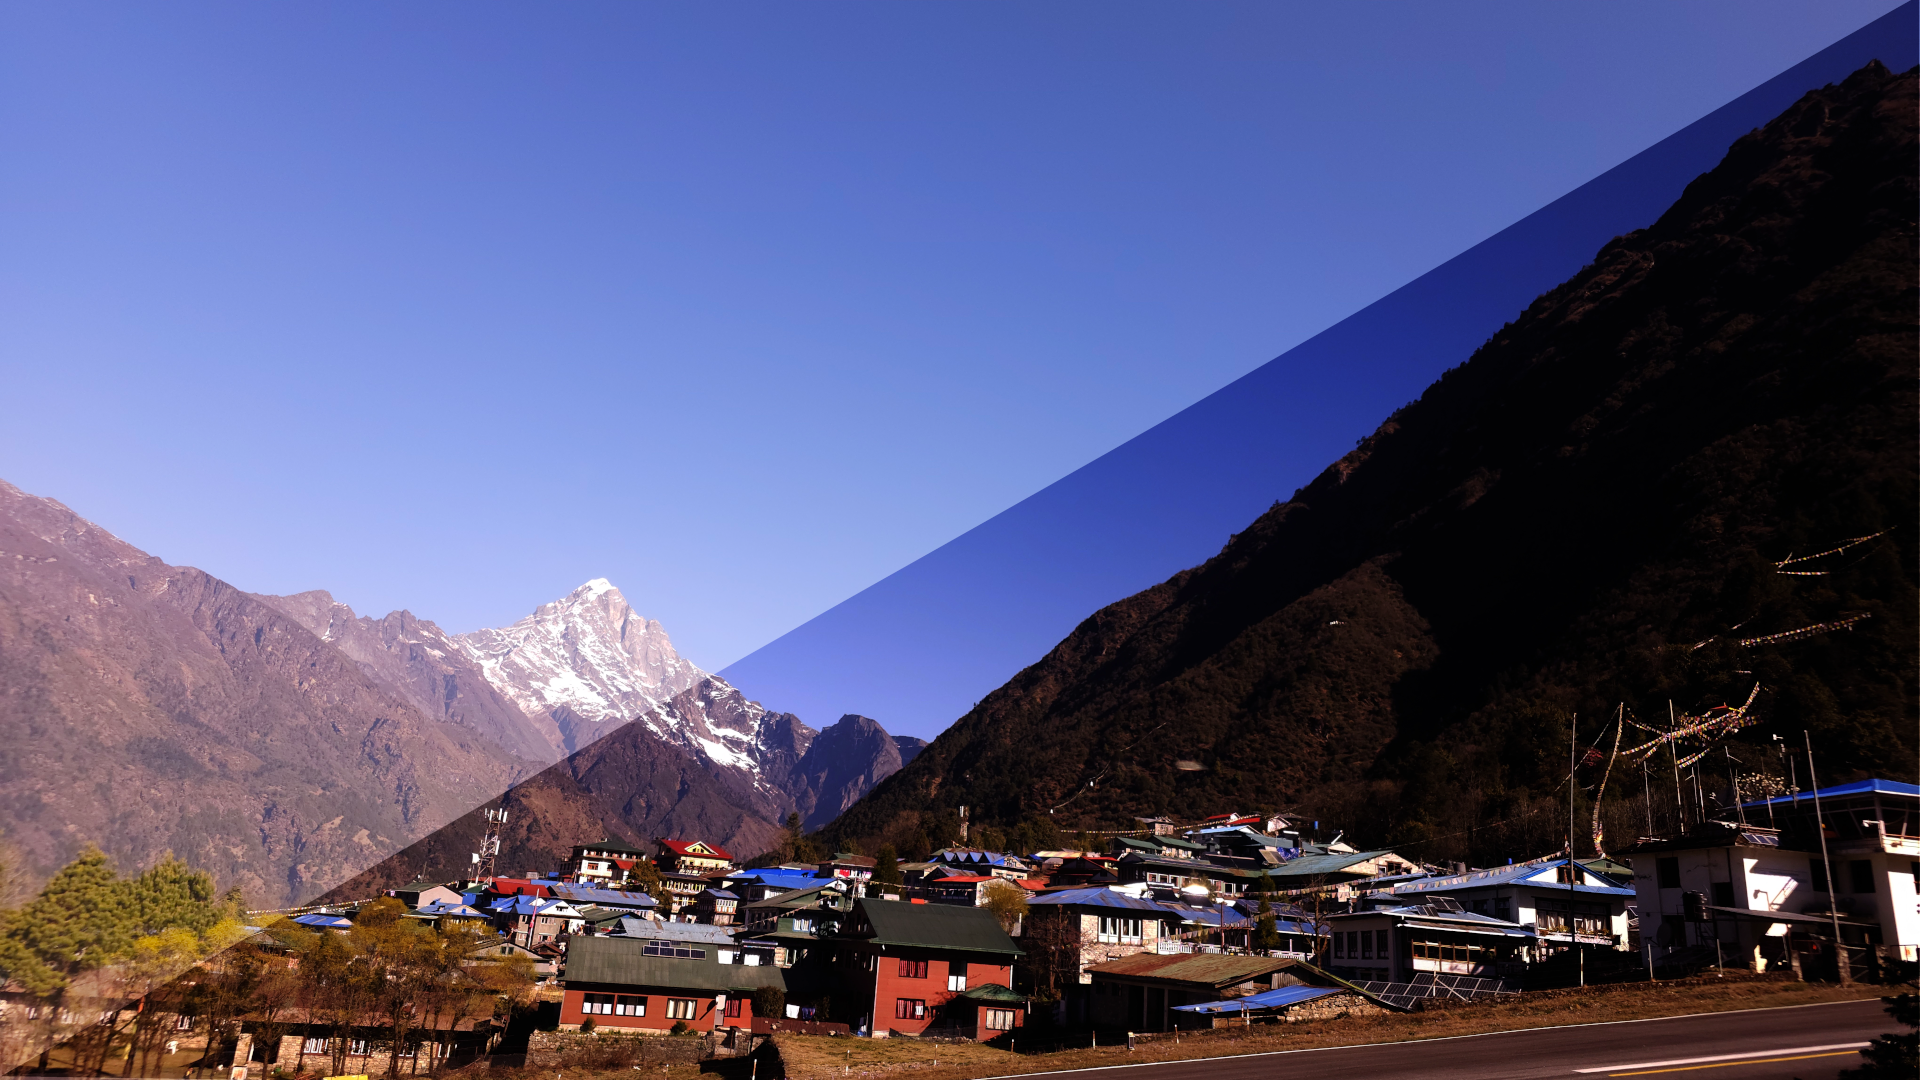
Why Not Compress Further by Default:
Since WebP provides excellent compression and quality, additional compression might yield diminishing returns or even degrade quality if pushed too far.
4.4. Other Optimization Techniques
- Minify CSS/JavaScript:
Reduce file sizes with minification tools. - Lazy Loading:
Defer loading of offscreen images. - Critical CSS:
Inline CSS necessary for above-the-fold content to speed up initial rendering.
5. Conclusion
Google Lighthouse is an invaluable tool for understanding your website's performance and identifying areas for improvement. By following this guide—from installing Node.js and Lighthouse to tuning Nginx caching and compression settings—you can significantly enhance the speed and responsiveness of your website.
Remember, while modern formats like WebP handle image compression well, continuous monitoring and optimization across all assets and server configurations will ensure your site delivers an excellent user experience.
Happy optimizing!